802.11s Wireless Mesh With OpenWRT

OpenWRT is an open source firmware for routers and AP’s that unlocks many features not usually available. This firmware will allow us to use the radio’s on the AP’s as mesh-point interfaces and also we can bridge the interfaces to the Ethernet ports so the devices act like one giant switch.

Loading OpenWRT On To The AP

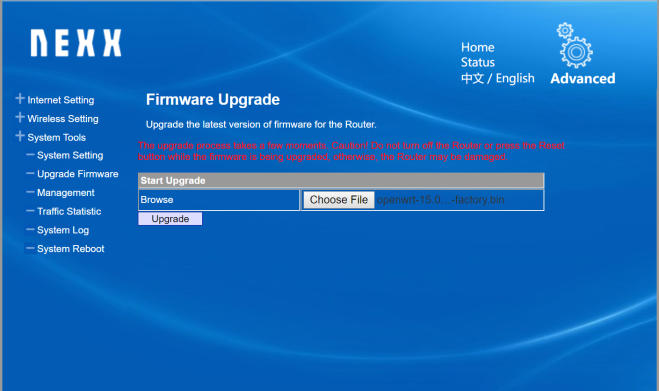
When we first log in to the AP we are greeted with the NEXX configuration portal login screen. We simply navigate to the firmware upgrade page and point to the: openwrt-18.06.1-ramips-mt7620-wt3020-8M-squashfs-sysupgrade.bin file I downloaded earlier. The whole process took about 5 minutes.

nexx wireless ap firmware upgrade

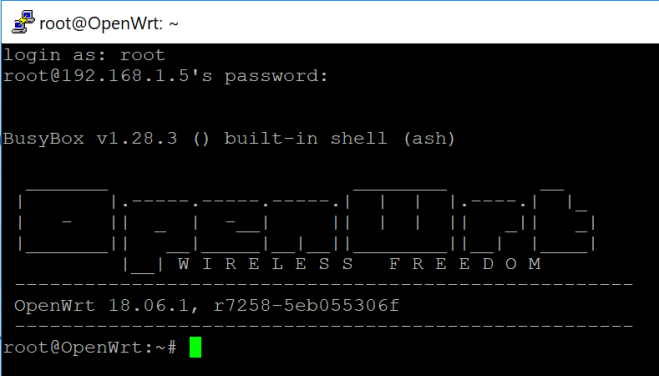
When we next try to login to the router, success is confirmed by the OpenWRT configuration login screen.

nexx wireless ap openwrt web interface

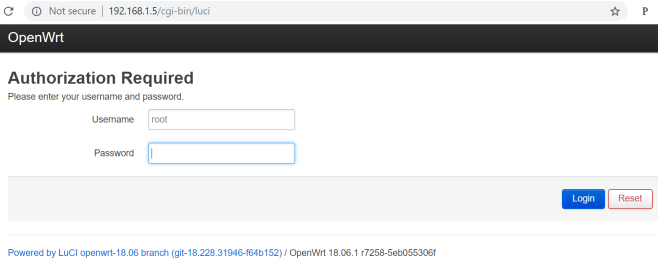
After changing the root password, SSH access to the AP becomes possible for more advanced configuration.

nexx wireless ap openwrt


Configuring The AP for 802.11 Mesh

Once we have the firmware installed on the devices, the configuration is relatively straightforward. We edit /etc/config/wireless

openwrt mesh config

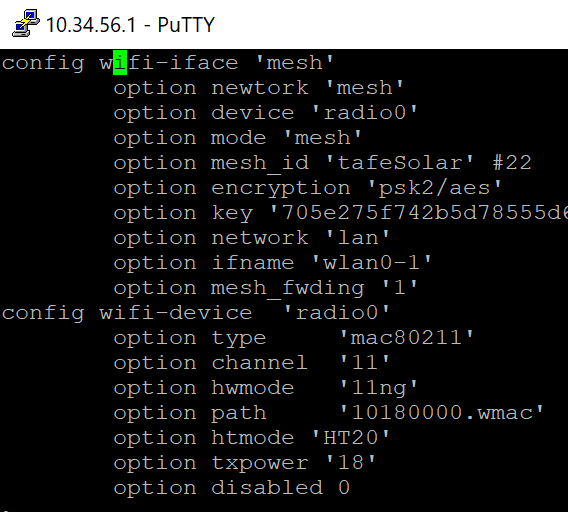
What this does is create a 802.11s mesh interface called “mesh” and it is linked to the “lan” interface, which means the mesh will create a single logical layer 2 domain.

Also the radio0 interface was switched on as it’s disabled by default. Finally the AP configuration section was completely removed as we’re not using these devices for Wi-Fi at all. This will improve security as the device will not be visible to anybody unless they are running specific software. It will also improve performance because the device will not be using the single radio for both AP mode and 802.11s.

Next we edit /etc/config/network to assign ip addresses to the LAN ports and set them to bridged mode, effectively making it so that any device connected to an AP in this mesh network will be connected as if they were all plugged in to the same switch. This will allow us to feed all the data we collect to the raspberry pi easily and with no need for major cabling.

openwrt lan config

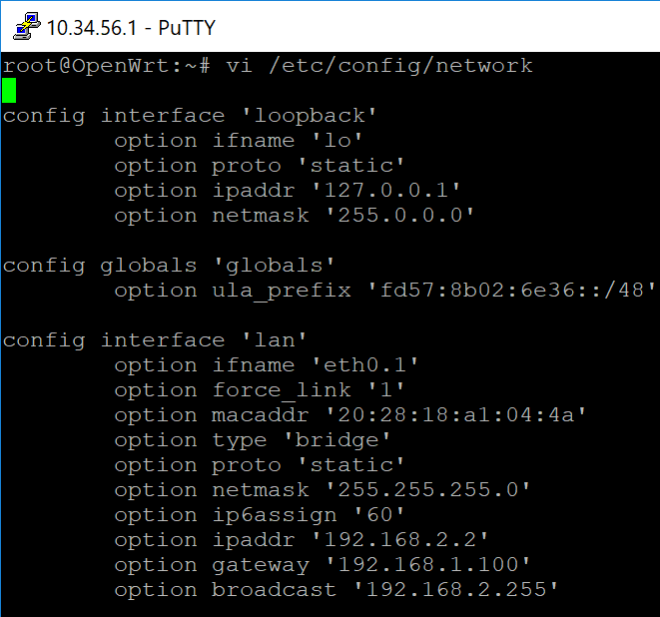
The beauty of this configuration is that it’s completely modular, if we want to add a new device to the network we simply load this configuration onto a new AP and it will add that device to the layer 2 topology.

Verifying Connectivity

Once we have set the configuration we can reset the services with the “wifi” command. We can verify the ap mesh interface is running with “iw dev wlan0 station dump.”

openwrt mesh broadcast.PNG

The output confirms that the mesh node is active. To check the status of peers we run “iw dev wlan0 mpath dump”.

openwrt mesh path

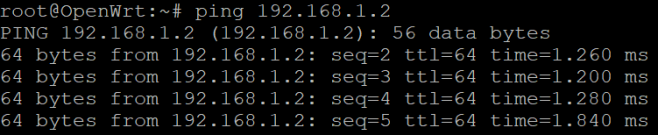
This shows the mesh link to the other node is active. Basic connectivity is confirmed by pinging from one AP to the other.

openwrt mesh ping

Using the Nexx AP’s with this configuration, we can add an arbitrary number of devices to the network quickly, cheaply and securely. The next step is to install the AP’s at Ultimo and start sending data to the raspberry pi.

Getting Started With BACnet

The BACNET protocol was developed to allow the exchange of information between networked building automation and control devices regardless of the particular building service they perform.(“BACnet,” 2018)

BACnet Python Library

BACpypes is a python library that allows us to write BACnet applications to interact with the devices on the network. Using BACpypes we will be able to write a custom application that joins the network and processes the data.

Getting Started With BACpypes

To start with we need to assign an ip address in the same subnet as the other BACnet devices in the network. Then we ping to verify basic connectivity.basic connectivity - ping (3)

Next we run the BACpypes sample script while capturing the packets with tcpdump and output to a pcap file for analysis.

bacpypes who is i am 2

tcpdump whoisiam

Success. We managed to capture the innotech controller’s iam response to the raspberry pi’s whois request.

innotech c20 i am

innotech c20 i am 2

We can see the packet contains some interesting information, such as the device object identifier and vendor id. To get useful information from the controller we will need to capture and decipher the device object, which contains a unique identifier for every sensor or customization setting that can be accessed. With this information we can run scripts to pull data from these points at specified intervals.

The code to do this is quite cumbersome so I’m going to try using a library on top of BACpypes that should hopefully simplify the process.

BAC0

BAC0 is a Python scripting application that uses BACpypes to process BACnet messages on a IP network. The BAC0 library simplifies the process immensely by turning simple one line commands into complex BACpypes scripts that can browse the BACnet network and read & write properties from BACnet devices.

Upon installing BAC0 successfully I keep getting an error message:

BAC0 error

I managed to resolve it by making sure bacpypes, pandas and BAC0 were up to date and able to be imported manually at the beginning of the python session.

I then launched a BACnet instance on the local machine and broadcast a whois message. The reply indicates a successful connection. After defining the controller with BAC0 we connect to the device to read the device object.

BAC0 solar ac

But when we try to read the points, it comes back as empty:

BAC0 no points error

After a week or so on github asking silly questions of the creator of BAC0. I was able to read the object list with a BACnet request.

BAC0 objectlist

What this output means is that the only objects configured on the controller are these 3 “file” objects. I thought that the object list would be contained within these files,  so I tried to read them using the BACNet “atomicReadFile” request.

bac0 read file 2

Unfortunately BACpypes doesn’t support reading the contents of the file, but it does support reading the “fileType” parameter of the file.

bac0 fileType

As we can see, the files do not contain the information we are looking for about the objects on the controller, so the problem appears to be the configuration on the controller itself. Until we get the controller configured properly this will be as far as we can get with BACpypes and BAC0.

UPDATE

After speaking with Innotech tech support it appears as though there aren’t any BACnet objects programmed on the controller. They haven’t offered me a way to add them myself so we are waiting for them to get back to us to move along further.

Remote Access To Raspberry Pi

Today we set up the raspberry pi at Ultimo Tafe in the solar room, it’s connected to the Innotech c20 controller. Remote access is provided by the use of a 3g dongle and the ngrok service gives us a public url that we can use for an ssh tunnel.

[picture of pi in solar room]

I had originally planned to run Kali Linux but I had some problems with the update process so decided to install Raspbian instead. I have installed the bacpypes package on the system which is a python implementation of the BACnet protocol application and network layer. I will do a much more thorough write up of BACnet and BACpypes in the next post but basically BACnet is a communication protocol and BACpypes allows us to run python scripts that pull data from the devices on the network.

bacpypes whoisiam

Ngrok

There are 2 problems with remote access through a 3g connection: the dynamic ip address and the fact that the ip address is not public facing. The program ngrok creates a secure tunnel between the raspberry pi and a cloud server, which in turn gives us a public facing url that makes remote ssh access possible. The free version allows one tunnel per account and the url changes if the connection between the pi and cloud server resets. There is a paid version that allows many more connections and a static url.

ngrok2

I’ve modified the .bashrc configuration file so the service starts every time raspbian boots up which means that we will still have access in the event of temporary power failure.

My implementation was a bit hacky because the program not only runs on boot, but also every time a ssh connection is made and also every time terminal is opened. It doesn’t actually cause any problems, ngrok just displays a message that the tunnel session failed because account is limited to one simultaneous connection.

ngrok

I’m not sure if i’ll bother changing it because we probably only need remote access temporarily and the system is doing what we need it to now.

Xpra

We can use a program called Xpra on the raspberry pi to run graphical programs on the pi, but have the output sent to my windows machine over the internet. Xpra forwards the information over a regular SSH connection courtesy of X11 frames much like other similar but uses a special OpenGl rendering method to make the process much faster.

xpra start midori
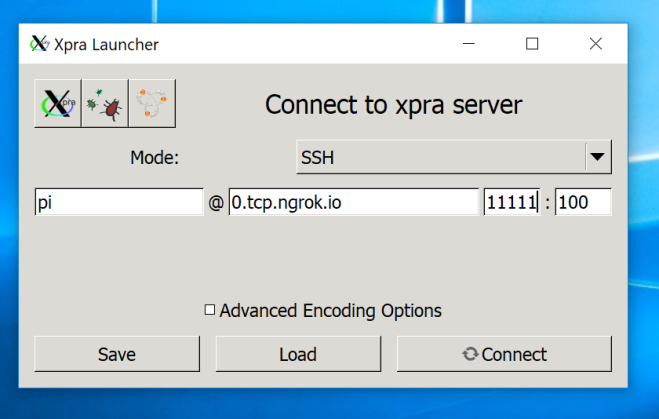
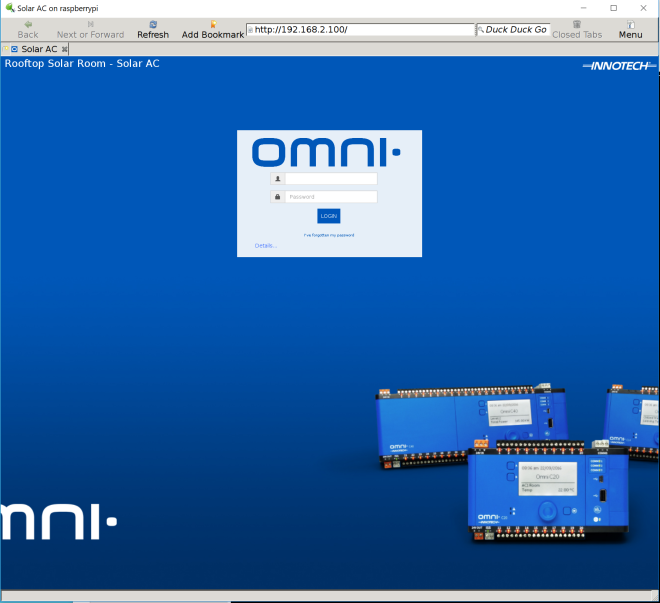
The above command launches an xpra output of the midori browser, that I can connect to on my windows machine. The process can be repeated to launch any program that requires graphical output. The screen program allows the daemon to run in the background after I disconnect.

xpra launcher windows

We can now use a web browser (or any other graphical program) on the raspberry pi outputting to the windows machine through the internet.

omni web portal.PNG

The next steps are getting the pi talking to the Innotech controller using BACpypes and setting up a wireless mesh network which we will be doing this week.


First days

Hi all,

The gear has been ordered.

1x Raspberry Pi + 2x OpenWRT compatible access points.

We still don’t really know where’ we’re gonna put the devices yet. Getting the Wireless heatmapping stuff to work is proving more of a challenge then we’d thought. But, that’s more of a nice to have; especially for the actual report. So, we can work on that as we go along.

As the devices are coming, we’re setting up a Raspberry Pi to handle the project. First, we need to get an OS installed, then we’ll need to install the required python packages. That’s all nitty gritty stuff. Stuff we’ll need to go in detail later. For now though, its basic set up.

Next monday, the 17th. We should be able to leave the Pi in the Tafe, we’re attaching a 3G dongle to it so we can set it up remotely. So we don’t have to ask to be let in all the time. From there, it’ll be a case of getting some script down to pull the information out the devices and log them in some sort of database.

Displaying the information on the lobby TV is also gonna be tricky. It looks as though the TV has wireless inbuilt in it already, which is handy. There are two ways to achieve our goals in this – one, we directly plug in the Pi, and the TV will just be it’s screen. Or, two; we make a simple LAN site and plug the screen in another device and that’ll act as the hub.

We don’t really want to plug the Pi directly into the TV, the Pi isn’t built for that type of thing. Too much overhead for the little guy. Might have to rethink our approach on that aspect. But, first we actually need to pull some data from the device and log it in a data base. That’s the ongoing problem we need to fix.

That’s also a job for Mathew to go in detail about.

  • John